My Lovely Followers

Tuesday, 28 January 2014

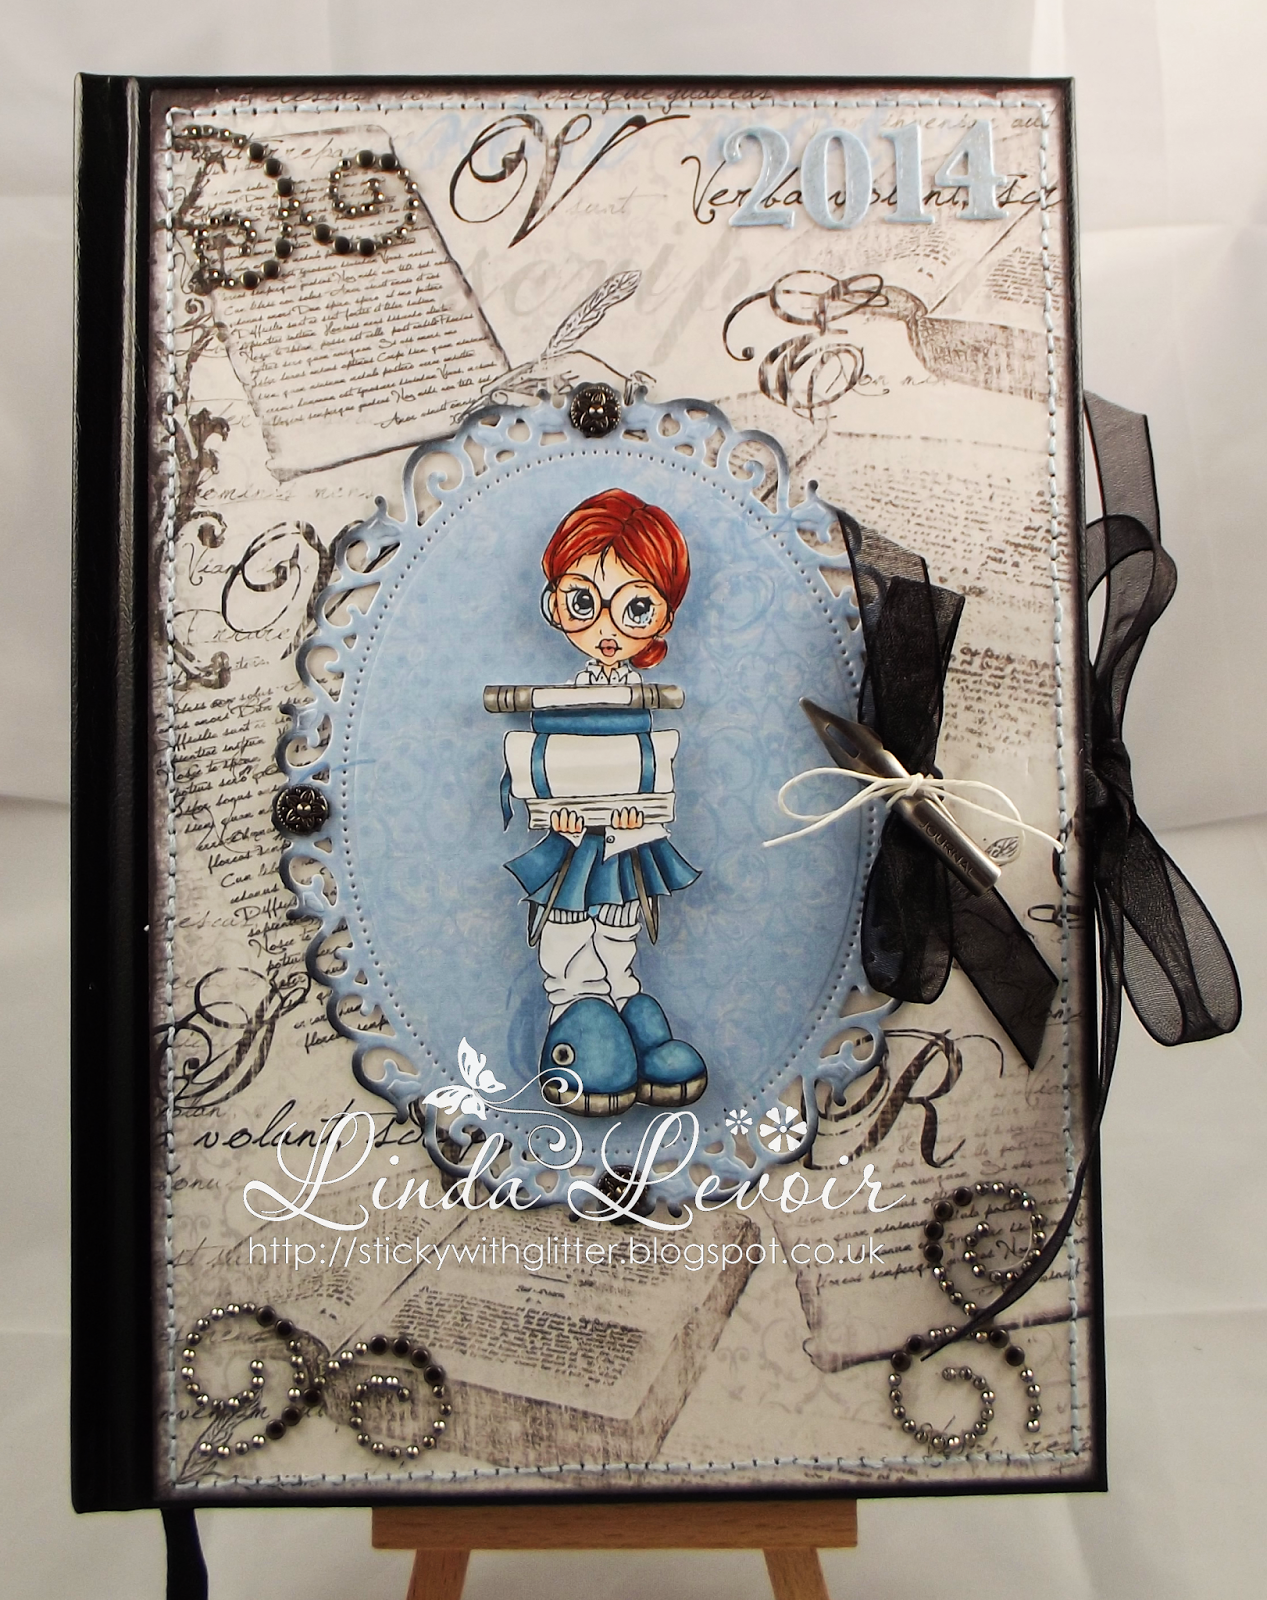
Saturated Canary Geeking' It Journal at DTDF

Happy Tuesday everyone!  I'm here with my inspiration post for Dies to Die for, and it's quite a simple one for me. I needed to whip up something quick as it's my other half's birthday today so I'm quite short on spare time this week.  I decided that for once I'd make something for me, so I decorated a diary that I'm using to keep track of all my DT work. Links to items in the store are at the end of the post as usual.


I used the oh so Gorgeous Crea Diem collection from Maja Design for this, it's double sided so you only need the one sheet. As this was an object that is going to be in use on a daily basis,  I tried to keep embellishments to a minimum, not easy for me if your know my work! lol


The stamp I used is called Geekin' It, a Saturated Canary design from Little Darlings Rubber Stamps.  I did take liberties with her and lopped the apple off of the top of her head, as I wanted the bookish look but didn't want it to look like a 'back to school' project, I hope she doesn't get peckish!  As this is staying with me at home, I did pop her up on some very tiny foam squares, but if it was for a gift I'd probably keep everything flat and give it all a protective coat in case it was going in a bag.

Well that's all from me today, I hope you enjoyed my simple share and that it inspired you to try something yourself. See you soon! :) xx


Sunday, 26 January 2014

Midway Reminder for masking at Totally Tilda

Good morning to all my lovely followers and visitors.  I hope you are all having a fantastic weekend.
I'm here with my midway reminder for Totally Tilda.  As I've been quite busy this week, I decided to go with a simple masking this time.  I've masked Tilda with Lovely Lace Shoes,  against a Whimsy Postcard Stamp.


I adore these papers, they're Pion Flower frames and you can get them in a 12'' x 12'' sheet or as a sheet of 4 different 6'' x 6'' designs.  They're just totally yummy.  I used a mix of a 12 x 12 and 6  x 6.  The colour is one of my favourites.
Isn't Tilda so cute with the writing on her shoes?  I just love this stamp, she's been sitting unused since I got her so I'm glad I found the opportunity to ink her up.  I coloured her with Copics, one of my new year's resolutions was to learn to use different colouring mediums, and if you saw my post yesterday you'll know that I actually ticked colouring in Distress Inks off that list, so expect to see a card from me in the future coloured with them.


 I've had this metal letter charm for ages now, it came free with a magazine I bought over a year ago to while away the time on a long journey,  but it always seemed too big to use as a charm. I think it looks good here, tucked away in the flowers and goes well with the postcard and the Tim Holtz pen nib I used up in the top right corner.


I decided to accent my card with a little yellow, just to make it 'pop', using some yellow seam binding and some yellow carnations and buttons. I also coloured up some pearls with my copics to match the paper and yellow embellishments. For the inside of the card I used a piece of the 6 x 6 designs with the floral frame on.  This works perfectly to give a place to write a message.

I do hope you like my card today, don't forget to pop over and give the rest of the girls some love, they've made some pretty awesome creations, and if you haven't already done so, join in the fun with us,  All you need is to mask a Tilda on your card, if you don't have a background stamp you can use a texture stamp or even mask her with another Tilda, or Edwin etc. 

Our Prize from  Bunny-Zoe crafts.com 


Enjoy the rest of your weekend, I'm off to make a card for Tuesday, see you then! :) xx


Saturday, 25 January 2014

Something New for Saturday


Afternoon all!  Big crafty hugs for everyone! Can you tell I'm glad it's the weekend? ;)

A big hi and welcome to my newest followers, thank you so much for joining me and a big thank you also to my older followers for sticking with me through all my random rambling lol.

Anyhoooo.....onto the reason that I'm here today.  Those of you who know me will know that for some time Ive been toying with the idea of Distress Ink colouring, it's something that I really admire.  Though I would NEVER abandon my Copics, I do think that for the very pale colours and when you're trying for a soft & delicate or vintage effect, colouring with  Distress Ink gives a lovely effect. I keep saying I'll try it in the future, when I have time...well I'm not sure that I really have time lol, but the future has arrived on my doorstep by way of a pad of Langton Extra Smooth, Hot Pressed Watercolour paper.

Very nervous about sharing this as this is my very first attempt at this, but I thought it might be interesting for you to see how it develops...there's no card yet, though I will put her on one later.


This is a very basic first attempt (I watched quite a few tutorials over the past few weeks) and I do not have any markers, this was done just with Ink Pads of which I have a limited range. I chose an image that I thought would be fairly easy to colour this way.

  One thing I do need it a decent paintbrush or 2 so I will be heading out tomorrow to buy those.  I did overdo her face a little, she looks like she's had quite the holiday lol, so I will be a bit lighter handed there next time (the face was the first part of her that I attempted).

I think this paper would be way too thick to go through my printer to print digis on, does anyone know if it comes in a lighter weight?

I will have to investigate by asking my DI expert friends, what will be the best colours for me to invest in, and buy some extra pads to boost my selection, but I will definitely be trying my hand at this again. Do let me know what you think.

For those interested these are the videos I watched 

Thanks for joining me and enjoy the rest of your Saturday, I'll be back tomorrow with my Totally Tilda mid-way reminder.  : ) x x 

Thursday, 23 January 2014

Tilda with Bunny Balloon for Marvelous Magnolia

Happy Thursday folks!  Just one more day till the weekend!  Weekends for me (among other things) mean more time to craft, so I'm always looking forward to them.

Anyhooo...today starts a new challenge over at Marvelous Magnolia and it's another easy one.  Pretty Pearls, we want to see pearls of some sort on your project.  Easy right?

I was have one of my 'try something different' moments when I made this card and really wanted to try out a card with folds.  I went for a 'magic' card I've seen a few and they always look pretty.

I followed this basic tutorial but I changed the dimensions slightly. It came out like this.


I used Tilda with Bunny Balloon, one of the new stamps from the Magnolia Lost & Found collection.  I think she's just adorable.  I paired her up with some beautiful Pion paper. This is Poem of Spring from the Fairytale of Spring collection, the delicate colours are just lovely.   


I went a little overboard with the pearls lol, but it is the theme of the challenge and I really thought that they suited this style of card.  


With this style of card you really need to decorate all of it with DP as it's pretty much all on show one way or another as you can see from these photos.


I stamped her again inside the card, there's still plenty of room to write a message, and added a sentiment to the underside of the flap.  


I even decorated the back!

I do hope you'll join in our challenge which runs for the next 2 weeks, we have 3 great sponsors
The Rubber Buggy, Stamping Tilda, Scrapbooking Boutique
 who are offering some fab prizes.  Pop over to the blog to check it out and while you're there take a look at the work of my fellow DT members, they really are fantastic!

Well that's it from me for today, enjoy the rest of your Thursday, I'll be back on Sunday with my midway reminder post for Totally Tilda. : ) x x


Tuesday, 21 January 2014

Alva Roses at Dies to Die for

Eeek I must have been more tired than I thought last night, because I scheduled my Dies to Die for post on this card and completely forgot to schedule my own.....so this is a 'little' later than it should have been lol

Oh well, better late than never.

I had a play with one of the new range from Bildmalarna 'Alva'  . These are a bit like grown up versions of the Mimosa stamps I think, anyway they are all gorgeous (Tracy has the full range in stock) and I found it VERY hard to choose just one.  But in the end I settled for this one, Alva Roses.

Isn't she gorgeous?  Links to products are listed at the bottom of my post and will take you straight to the item in the store.


I used some fab papers from Inkidoo, the good news is that they're on sale!


A side view of those wonderful butterflies, love those dies.


I didn't put too many embellishments on my card, because the butterfly dies are so stunning they don't need much else, just a few pearls to highlight, a strip of pink lace and some smaller flowers from Wild Orchid Crafts.
I cut the border into pieces so that I could place it around my frame, I love that it's so versatile that you don't have to use it just as a border, though it does make a very pretty one.

Well that's it for me today, hope you like it. Enjoy the rest of your Tuesday  and I'll see you again on Thursday for my Marvelous Magnolia post...I'll remember to schedule that one...honest!!  : ) xx


Sunday, 19 January 2014

I'm a Tilda-ette!

Good morning !  I hope you're all enjoying your weekend. I'm here with some very exciting news, I'm now part of the Totally Tilda Design Team!
The lovely and incredibly fun Susie Sugar asked me to join the team some time back, and of course I didn't hesitate to say yes,  but as they were all on their Christmas break and not due to start back till today,  I've had to keep it hush hush till now. It was sooo exciting to be asked to be part of this super talented team, and of course using Tildas (and sometimes Edwins) that I love so much.

Totally Tilda challenges are posted on a Sunday and run for 2 weeks, I do hope you'll play along with me. Our challenge this week is masking and I must admit it was a nervous start for me, I was eager to make a good entrance, but I've not ever really masked much before, the closest was masking an image with a texture stamp.  Anyway I did have 2 stamps that I'd bought some time back and never inked and they were perfect for this challenge so I gave it a try. This is what I made.


I decided to go for a monochrome look, mostly because I wasn't too keen on colouring that phone box in red when I was already stressing about the masking lol.  I do like monochrome a lot though, I was going to add just a splash of colour with ribbon or flowers, but after trying a few options I decided I just like it in grey and ivory.  The papers are DCWV, from a 12 x 12 Black Currant stack that I've had in my drawer for ages and rarely ever use, but it was perfect for this.


The stamps I used were London Tilda and Vintage Phone Booth from the Little London collection.  I coloured them with Copics in the W tones. The masking is not perfect, I'm not experienced enough with it to tell wether it's normal to have a few tiny 'missing' spots where the stamp comes off the mask or not.  If so I need to invest in a fine liner I think, if not, I need more practise!


The flowers are all from The Ribbon Girl.  The fab metal book plate up in the corner is by Tim Holtz, love the way it looks on this card, but I was worried when I first added it that it was going to pull the card over with the weight!  Luckily I use quite heavy cardstock, so once the card was all put together that didn't happen *phew*


I added a bit of cheesecloth beneath the matted image, some ivory lace which once again I have virtually covered like a numpty and some silver grey satin ribbon and a sparkly button.


The inside I decorated very simply with matching papers and plenty of space to write a message.

I hope you like my first card for Totally Tilda challenges, do pop across to the blog here and give the rest of the team some love, they've made some fabulous creations, and do get your stamps out and join in.
Our sponsor this week is 

gif maker

and they're giving away this lovely prize to our winner.


You have 2 weeks to show us your wonderful creations, so come on, show us your masking, if I can do it it can't be that hard ! I'm off now to visit some blogs and leave some love.

I've entered the following challenges:


Have a lovely Sunday : ) xx
 

Friday, 17 January 2014

Samantha- Sketch at A Creative Romance

Happy Friday everyone!  I'm here with my DT post  for A Creative Romance and for this challenge we want you to follow a sketch. The lovely Becky has made a very easy sketch for us to follow so for once I finished my card pretty quickly.

This is what I made for inspiration.  This is my first time using Kraftin Kimmie stamps, but it certainly won't be my last, as this was extremely fun to colour.  Tracy at Dies to Die,  for has all her Kraftin Kimmie stamps on sale right now, you can pick them up really cheaply!


This was one of those cards that almost made itself.  I had Becky's Setch to follow, and I knew I wanted to use this stamp which I just recently got....Samantha, love her and such a great image to colour. Then I spotted a photo inspiration challenge at Kraftin Kimmie Stamps


and that was that. I found paper and embellies in my hoard that this photo inspired me to use, coloured her up to match and I was off and running....card made in double quick time lol.


Copic colours used:
Skin: E0000, 000, 00, 11, R20, 00
Hair: E50, 53, 31, 35
Clothes and lipstick: W0, 3, 5, 7, R32, 35, 37, 56
I used Lots of Stickles in gold on her eyelids, compact and shoes.


I used some gold embossing powder around the edges of my card and the frame, the bling is Prima. The shape is made with a Go Create Frilly Frames die.


These fab papers are MME Lost and Found - Record It. The sentiment comes with the stamp.
The crushed silky ribbon is from the Ribbon Girl. The red heart button and black lace is from my stash.

So I hope I've inspired you a little and that you'll join in with our challenge, do go check out the rest of the DT work here, they're just gorgeous!

Our sponsor this week is 


who are offering a £10 voucher to our winner.  So do join in, it's a lovely sketch to follow  :) xx