Good morning :) I've had a lot of questions recently about how I stitch my cards so neatly.Well I don't use a sewing machine, I hand stitch them and I decided to make a little step by step tutorial to explain how I do it. This was posted yesterday on the La-La Land inspiration blog for Tutorial Thursday, and today I'm posting it here. I'll also add it to my tutorial blog soon so you can find it under the tutorials tab at the bottom of my page.
Ok, so onto the tutorial.
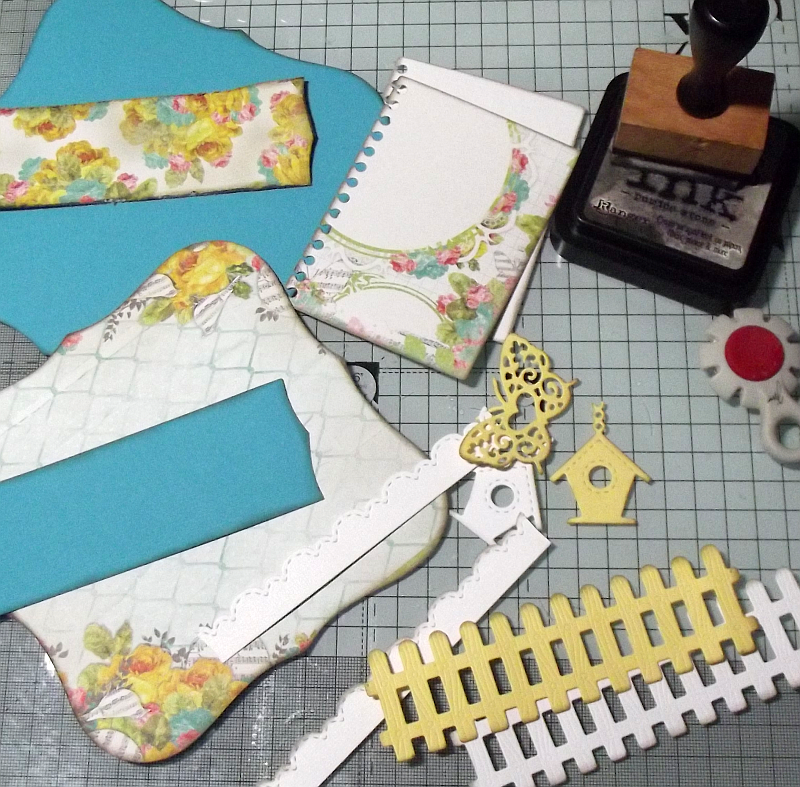
First of all you'll need to gather your equipment.


You'll need a piercing tool (make sure it's narrow enough to fit in whatever you're using as your piercing guide), a piercing guide (this can be a piercing template or a ruler with holes, the one I use is by Tim Holtz), a piercing mat (the one I use is by Memory Keepers), if you can't get a piercing mat you can use an embossing mat, but you'll need to put an old magazine or something underneath it to protect your table. You'll also need scissors, a sewing needle with a reasonably large eye, glue or double sided tape and Top Stitch thread (if you're using regular thread you'll need to double up at least to get the same effect, I would really recommend top stitch thread),I use Guttermans. You can use plain white or cream, but I love to use colours as I think it adds a nice touch to my cards.
Work out your card design and cut all your pieces, if you're distressing and or inking the edges, you'll need to do this before stitching.

Now glue your patterned paper to your backing card. You'll want your glue or tape only in the middle, this is just to hold it while stitching, your stitched will actually hold your layers together and you won't want to be trying to stitch through glue. Let your glue dry thoroughly before starting to pierce.

For straight lines, line your piercing guide up with your paper and poke through the holes with your piercing tool, holding your guide in place with your other hand (I couldn't do this here as I was operating the camera!)


If you're piercing a shaped piece I recommend piercing any pointed bits first and working in sections, you'll need to work freehand and just eyeball your spacing, don't worry if it's not perfect, it's much less noticeable on a shaped card.


Then stitch your card, using back-stitch as shown.
If you've never used back-stitch before the diagram below should help.


Make sure you sew through your threads at the back a few times to finish off, you don't want your stitching coming loose once you've glued your card together, and that's it! It does take quite a while to do but I find hand sewing quite relaxing, for me it's just another enjoyable part of crafting.

Here's my finished card


and here's another example of some of my hand-stitching on cards.
I hope you enjoyed my tutorial and it has inspired you to give stitching your cards a try, and do ask me if you have any questions or you're not sure of anything here.
: ) x x

Chapeau-bas, Linda! I thought no-one's using hand sewing these days, but now you've motivated me! It always looks so cool. Thank you for the tutorial and keep on doing that good job!
ReplyDeleteHave a nice weekend!
Anna xxx
Thank you for sharing such a fabulous tutorial Linda. I always admire your neat stitching and I like how you often use different colours too.
ReplyDeletehugs Sue xx
thank you Linda for the tutorial!
ReplyDeleteand your cards? wowwwww!!
A fab tutorial and well explained. As you have shown stitching finishes off your projects beautifully and gives them an added dimension and texture, I will endeavour to give it a go again. Thanks Linda.
ReplyDeleteLorraine
Gorgeous card!! Oh what a great tutorial Linda! I wish I had seen this a few days ago, I did some hand stitching on a DT card and made a right mess of it! I so need one of those rulers.
ReplyDeleteThank you xxx
Mel.
Thank you for the wonderfully clear tutorial, I will certainly use it!
ReplyDeleteHave a lovely weekend!
Hugs
Gina x
Thank you so much for this tutorial! I think that now might actually do some stitching on my cards/projects. :) Hugs! xx
ReplyDeleteThat's great, thanks for sharing. Card looks awesome.
ReplyDeleteFANTASTIC tutorial Linda!! Your card is just BEAUTIFUL!!! You make the hand stitching look so easy...while I know that it's not!!
ReplyDeleteTake care and have a wonderful weekend Linda!!
Beth