My Lovely Followers

Saturday, 3 August 2013

Joy Fold Christmas

There are 2 challenges this week (well there may be more but there are 2 I know about lol), that ask for a fancy fold.

I thought about doing an easel or a criss cross card as I've made these before and know what I'm doing, but then I thought, 'I should really stretch myself a bit more and try something new'.  So I took a deep breath and turned to my trusty Google for some information. 

O...M...G

I was agape at the amount of different types of cards and folds out there.  Some of them seemed very complex and a bit out of my beginner zone, I didn't really think I could cope right now with lots of complex measurements for things like stepper cards and things that look like Origami etc.  So I thought I'd try my hand at a Joy Fold card, only me being me, I had to try something a little bit different from the standard.  I looked around for a few ideas and inspirations and settled on going for a shaped Joy Fold card.

This is what I came up with, I hope you like it.


I was pretty pleased with the way this turned out.  I tried to keep things fairly simple as the fold and shape itself combined with the DP (Winter Blues from Whimsy) was busy enough and I didn't want to detract too much from it.
I used a glue and glitter technique to make the flowers look like they are covered in frost, I'm really happy with the way they look.
One flap of the card was cut with a Go Kreate die, being very careful not to cut into the back of the card.  For the extra fold I cut a shape with a Spellbinders label die on plain white cardstock, covered it on both sides with DP and then folded and glued the small flap to the base card (this was covered when I decorated the inside of the card).  
The oval shape with the image was glued to the same shape cut in DP to back it, I adhered a Snowflake Corner cut with a Memory Box die in between the 2 layers, (I really like the 3 dimensional effect it gives overlaying the background) the whole thing was then glued on top of the extra fold. I used a snowflake cut with a Whimsy die to keep the fold closed, it's mounted on some adhesive foam and has a pearl brad in the centre to give it some more weight.


The image is Ice Tilda, I coloured her simply with my Copics.  I just received a couple of new Christmas themed Tilda rubber stamps in the post, so the next Magnolia Xmas card will be different I promise lol.
i decorated the image with some liquid pearls in opal to look a bit like falling snow and tied on a little snowflake charm with button twine.


This is what the inside looks like when the card is open, I didn't add another thing as the design of the paper gives somewhere to write anyway.
All the papers and the snowflakes have been distressed with Antique Linen distress ink.


A closer view of my 'frosted' flowers.


I'll edit the post later to add links to products, still playing with Inlinkz, but if I can't get it to work I'll come back and add them manually like normally.

Well that's it from me, I hope you like it, Ireally enjoyed making it even though to start with I had a lot of 'head scratching' moments, and apologies for the length of the post, I seem to have waffled on a lot in this one lol.

I'm entering the following challenges with this card:


Birthday Party


Ahh le weekend!  It's been super busy at work and I've been looking forward to some down time and time to craft.  Had a few projects and challenges in mind which I've just not had time to do, but now I can craft my little heart out.
I really should check my lottery tickets, I have 3 unchecked lol, I could be a millionare, but ofc once you check them you aren't...and while they're unchecked I can still dream right? ;)

I chose the image (Best Day Ever from Sugar Nellie) with the challenge from Wild Orchid Crafts in mind, but as I've entered her in several challenges and they only allow 3 including theirs (oops my mistake), I will have to enter another one for that lol. She's a Sugar Nellie image I coloured up in work as usual in Copics. I've listed the colours below. 


Skin: E000, 00, 11, 21, R20
Hair: E50, 51, 53, 29
Dress, Shoes, Flowers and Presents: R81, 83, 85, B000, 12, Y00, 02
Mouse: E53, 51, 50, R11, 20


I made a shaped card with my one and only set of Go Kreate dies, must get more of these, another thing on my ever growing wish list hehe.
I added several layers to the card which consist of a large doily, another layer of (gorgeous Maja) DP cut with the smaller Go Create die from the set, some cheesecloth and more DP cut with a punch, some beautiful lace on top of that and then the frame cut with a nestie.  I fussy cut the image and mounted it with foam squares.
There's also a tag nestled between the yellow layer and the doily. I think I may have gone overboard on the layers now I'm typing them all out!
All the papers were distressed with Walnut Stain.


I added some flowers to match the colours I used, unusual for me to go for more than 2 colours but I'm entering a Fav Colour Combo challenge and I really couldn't decide lol. I added a small amount of Frantage in Shabby Pink on the edges of the frame and around the image.


The beautiful sparkly ribbon used for the bow isn't really done justice by the photos.
I've added some of the links to products used below, but I couldn't get Inlinkz to work with The Ribbon Girls or Wild Orchid Crafts. Ribbon and binding are from the former, flowers are from the latter.


I'm entering this card for the following challenges:


Enjoy the rest of your Saturday, I do have another card ready to share, so that will be later tonight or tomorrow morning depending on what time I have.

Thanks for visiting xx


Thursday, 1 August 2013

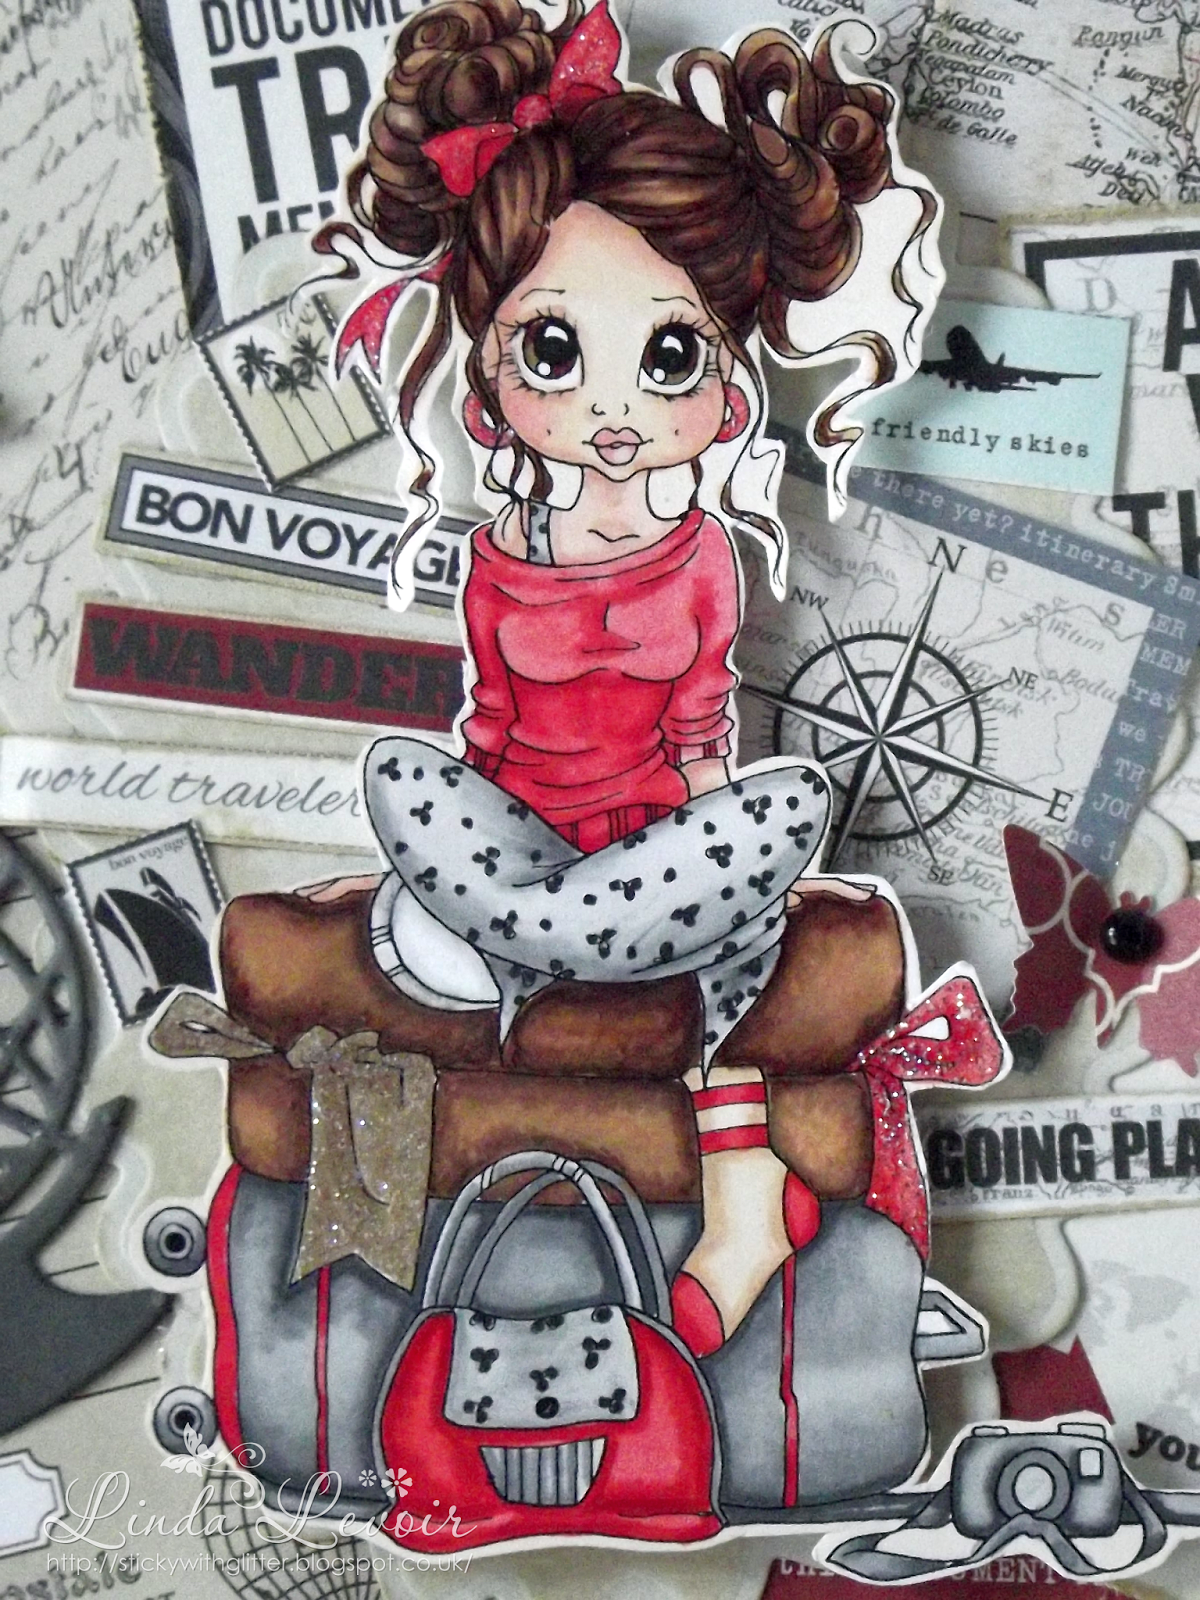
Bon Voyage

Good evening, it's turned into a scorcher again today and I was very happy to get home this evening, the journey on 2 buses really isn't pleasant when the weather is like this lol.

First up I have some news, I won another challenge!  *Points excitedly to the new blinkie in the top left corner*.  I won the beginner challenge at Marvellous Magnolia, I'm soo happy, it's been such a good week for me :)


Ok, on to the card I'm sharing.  I was asked by a work colleague to make a card for a friend of hers who was leaving to go travelling.


I knew right away what image I wanted to use as I'd been eyeing up Pack Light for some time, I just had nothing that I'd use her on so this was perfect. I'd also seen just the papers I wanted to use, so this card almost made itself.


I coloured her with Copics and Promarkers, sorry but I forget to make a note of them.
I must admit is was pretty strange not using very much in the way of embellishments, no ribbon or lace or flowers.  But really it was all about the image and the collage made from the designer papers from Teresa Collins, that carried the theme, I think anything more wouldn't have looked right.
I used a nesties die cut to cut out the map and a Doo-Hickey one for the tag.
The globe was a sample die cut that was sent through with an order from Dies to Die for, I love it that Tracey does that, it's such a nice touch and this one was perfect for this card, I think it's from a Whimsy die. I added some glamour dust to the image, but as usual the photo really doesn't do this stuff justice.
Other than that and a few black pearls and some small butterflies cut with an x-cut punch it was just elements hand cut from the designer papers.


I used more cut outs from the DP to decorate the inside of the card, and tops it with a scalloped oval (these are from X-Cut) and a little bit of liquid pearls.

I was really thrilled with the way this card turned out and my colleague loved it so that was win!
I hope you like it too, if you do, please leave me a comment :)

I'm entering this card for the following challenges: