My Lovely Followers

Showing posts with label Whimsy Stamps. Show all posts

Tuesday, 14 August 2018

Hunky Dory

Hello!

I'm showcasing a couple of new products from the Whimsy Stamps August release on my card today.

For the background I used a rainbow of Distress Inks and the Teardrop Splash Stencil on a white panel and then stamped one of the large sentiments from the Cheeky Sentiments set, with Versamark ink and heat embossed with black embossing powder.

I stamped the smaller sentiments from the set on black card and embossed with white embossing powder.

After cutting my 2 panels, the larger on in black cardstock, I adhered to my card base and then attached my trimmed sentiments popped up on some narrow foam tape.

To finish my card I added some colourful enamel dots.


*NEW Teardrop Splash Stencil *NEW Cheeky Sentiments Clear Stamps VersaMark Full-Size Ink Pad - Original (Clear)
Black Embossing Powder White Embossing Powder - Super Fine Detail *NEW Summer Breeze Enamel Dots

Thanks so much for popping in on me!


Wednesday, 3 January 2018

Whimsy Stamps Jan Release Day 3

Hello!

I'm sharing a little more inspiration today from the new release over at Whimsy Stamps/

I've used 3 new products on my card today. The image is a rubber stamp from Krista Heij-Barber, coloured with Zig Clean Color Real Brush Markers, and the background is made with Distress Ink and one the new Stencils that Whimsy has just released, this one is called Sun Rays. The sentiment is from the new clear stamp set Be My Always, which is a really versatile mix and match sentiment set with some larger focal words included also.
I've linked all the items and you can go directly to them in the shop by clicking on the pictures at the end of the post.


*NEW Unicorn Cupid*NEW Sun Rays Stencil*NEW You're My Always

Don't forget to check out the rest of the new products here!

Thanks so much for dropping by!

Thursday, 14 September 2017

Altenew - Happy Retirement

Hello!

Recently a lovely lady in my department retired and I was asked to make a card for her.  I made it quite large as the whole department needed to sign it, so I made it 5 x 7 and added an insert so there was more space to write.

I used the Peony Bouquet stamp set from Altenew, stamping with Versamark ink and embossing with Altenew Crisp Pure White embossing powder. 


I coloured the flowers and leaves with my Zig Markers, using Yellow, Bright Yellow and Orange for the flowers and Light Green for the leaves.
I made an ink blended panel using Fossilized Amber and Abandoned Coral Distress Oxides and glued that to the centre of my card base, gluing a panel of vellum over the top to give a soft appearance.
I cut one MFT Snow Drifts Cover Up Die-namics in smooth white cardstock gluing it to the back of a white cardstock frame cut with MFT Pierced Frames Die-namics. 
I used my Gansai Tambi Starry Colors watercolours to splatter some small gold dots over this and then glued it on the front of my card, covering the edges of the vellum and blended panel.
I cut another piece of white cardstock with MFT Double Stitched Rectangles STAX and stamped a retirement sentiment in Versamark ink, from Whimsy Stamps Happy Sayings stamp set and embossed this with Altenew Crisp Embossing Power in Antique Gold.


I blended a scrap of watercolour paper with distress inks in yellows and oranges and then cut out the word HAPPY with MFT Happy Greetings Die-namics layering it up with another 2 cut from white cardstock and adhering it abover my stamped sentiment. I them glued the rectangle to the centre of my card.

I fussy cut all my flowers and leaves and arranged them around my card, adhering them with foam tape for some dimension.
To finish I added some gold enamel dots I made with Pale Gold Nuvo Drops, and some Crystal Clear sequins.

I hope you enjoyed my project today, I really enjoyed making it.

Thanks for dropping by!

Sunday, 23 April 2017

Whimsy Stamps - Wee Stamps - Freesia

Hello!

Now I have some free time and the internet seems to be behaving a little better, I'm catching up on some makes from the last few weeks.

This post also serves as a reminder for The Ribbon Girl  April Use Any Image Challenge.

You can find the challenge here, and you still have a week to enter your project, you make any project as long as it has an image on it.

My card today uses Freesia, from the Whimsy Stamps, Wee Stamps collection.


This cute little bunny was released in March and although it was perfect for Easter makes, I think it works just as well for birthdays and other occasions. So a birthday card is what I made using a sentiment from the newly released Vintage Birthday Frames Sentiment collection from Whimsy Stamps.

I coloured my little bunny with my distress ink markers.

I also used the following items from The Ribbon Girl


That's all for today but I'll be back again tomorrow, have a great Sunday!


Tuesday, 28 March 2017

Technique Tuesday #14 - Mother's Day Hugs

Hello! I'm flying in a little late with my technique Tuesday today because I went down to London to visit with my daughter at the weekend and as I had Monday off I was of course forgetting that today was Tuesday.

Anyway it's a quick post from me as I'm dashing this off in my lunch break at work, but this was the Mother's Day card that I sent to my Mum.

I started by stamping the background with Versamark ink using the  stamp from Simon Says Stamp onto watercolour cardstock and then heat embossing with white embossing powder.


I then used a combination of Worn Lipstick, Aged Mahogany and Victorian Velvet to 'colour in' the circles with my blending tool. Once I'd finished I cleaned up the embossed areas with some absorbent paper and ran the whole piece through my Big Shot with the MFT Snow Drifts cover up die. I cut this out a second time from some smooth white cardstock and used the frame part as a base to inlay the die cut pieces of my background, adhering everything directly to my card base.

I cut the MFT Large Hugs Word Die 3 times from some white cardstock and once more from some lustre cardstock in cherry red, and then stacked and glued the layers of each letter with the red on top.

I stamped the mother's day sentiment from Whimsy Stamps Happy Everything set with Versamark ink on some vellum and heat embossed with gold embossing powder and then die cut it with one of MFT's Stitched Sentiment Strips.

I glued the vellum sentiment strip to my card and layered the HUGS on the top, hiding the glue on the vellum beneath the letters and some sequins, from Little Things by Lucy,  which I used to finish embellishing my card.

I've listed my materials below for you with links where available

Tim Holtz Watercolour Card
Simon Says Stamp - Circle Doodle Background Stamp
Distress Inks in Worn Lipstick, Victorian Velvet and Aged Mahogany
Smooth White Cardstock
Cherry Red Lustre Cardstock
MFT Snow Drifts Cover Up Dienamics
MFT Big Hugs Dienamics
Rose Gold Sparkly Shaker Collection

That's all from me today, hopefully my craft/guest room project will be finished by the weekend and I can get back to normal making and posting.

Thanks for visiting!

Sunday, 15 January 2017

Mistletoe Fairy with a Twist

Hello!!

It's Sunday again already, (and halfway through January too, eeek!), I thought I'd petition Old Father Time to slow things down a bit... maybe just for the weekends....perhaps the evenings too. Hey if he wants he can speed up work days a bit to make up the difference! I have the best ideas don't I? 
Of course he hasn't relied to my email as yet....maybe he's still sleeping off the New Year celebrations.

Anyhoooooooo...
Since it's the 3rd Sunday in the month, that means it's time for a new challenge at 

As usual we want to see any projects you make, as long as they use an image on them.

For my contribution this week I used the lovely Mistletoe Fairy from Whimsy Stamps.
I fell in love with this as soon as I saw her and coloured her up straight away in Winter Mode. But I thought to myself, why limit her to Christmas and Winter cards? It seems such a shame to leave her in the drawer after Christmas.
So I had a little play and coloured her up with some summer colours where her Mistletoe became pretty pink berries.

What do you think?

I actually used some of my Precious Maja Design Vintage Summer Basics 1933 for this. I only have one sheet left now and I will be so sad to see it finished as I can't get it anywhere now and I love the mix of aqua and pink.

She's coloured in Distress Ink markers to match the papers and I used the following colours:
Tea Dye, Vintage Photo, Spun Sugar, Victorian Velvet, Broken China, Tumbled Glass, Bundled Sage and Picked Raspberry.

Products Used:

Cheesecloth
15 mm Pale Pink Satin Ribbon
20 mm Sylvia Pale Aqua Lace
6 mm Ivory Pearl Trim
Ivory Magnolia Flower
Beaded Cherries Pink
20 mm Ivory Open Rose
10 mm Ivory Open Roses
Miniature Pale Mint Blossoms
Hip Rose Bud Cream
Rose Leaves - Green
11 mm Ivory FB Pearls
8 mm Ivroy FB Pearls
6 mm Ivory FB Pearls

I do hope you can join in, you can win some lovely prizes from our sponsors

First prize:  £10 voucher for LOTV
Second prize:  £10 voucher for The Ribbon Girl
Third prize:  from Marianne Designs

and don't forget to ogle the rest of the team's gorgeous makes!

Thanks for visiting

Monday, 19 December 2016

Penguins and Holly

Happy Monday!

Well this should have gone live this morning, but guess who forgot to hit 'Publish' after scheduling.....doh!
I have another CAS Christmas card to share with you using the Mama Elephant Pola Pals stamp and die set.


This time I used the other stamps from the set, the Penguins. I coloured them up with my distress markers, cut them out with the matching dies and popped them on a card with some holly patterned paper from my stash and edged that with some red cardstock.
I added a couple of little banners with a sentiment heat embossed with white on the red one and finished off with a few red and white matte enamel dots.

Mama Elephant Polar Pals Stamp Set
Mama Elephant Polar Pals Matching Die Set
Whimsy Stamps Shaker Builder - Sweetest Birthday
MFT Double Stitched Rectangle Die
Your Next Stamp Fishtail/Banner Die
La-La Land Stitched Circles Die
Whimsy Stamps Christmas Cheer Enamel Dots

I'll see you tomorrow with another Technique Tuesday


Sunday, 18 December 2016

Tiddly Inks - Molly My Sweet


Hello!
It's time for our final challenge of the year over at The Ribbon Girl, and as usual it's Anything Goes with an Image.

I used the aptly named Molly My Sweet on my card. She certainly is super sweet and after all my CAS makes for Christmas recently it was really nice to let myself go in my more usual softly shabby style with this.


Molly is coloured with distress ink markers and I tried some different combos out and DID write them down, but I cannot for the life of me find what I've done with that list! If they turn up I'll add them to the post.

I used the cake from the Whimsy Stamps Sweetest Birthday Shaker Builder Die Set and stamped a little sentiment from the Mama Elephant Mini Messages set onto the bottom part which I thought worked really well. The top half I slathered with glamour dust for sprinkles.

I used the following embellishments from The Ribbon Girl

Peach Vintage Style Seam Binding 
Apricot Sheer Ribbon
Cheesecloth
Clementine Ivory Lace
Orange Frosted Berries
5 mm S/A Gems
3 mm S/A Gems

I do hope you can find time to join in with our final challenge of 2016,
there are some lovely prizes to be won.

First prize:  £10 voucher for Lili of the Valley


Second prize:  £10 voucher for The Ribbon Girl


Third Prize from Marianne Designs


Take care and I'll see you soon!

Saturday, 17 December 2016

Mama Elephant - Polar Pals


Hello!

I've been super busy at work recently, but I've still managed to get some Christmas crafting done in my down time.....quite a lot of cards actually. How you ask? Well I bought a Mama Elephant Polar Pals Stamp Set and matching dies, and proceeded to see how many different CAS cards I could knock out with them. I surprised even myself.

Now these are all super quickly made cards, no do not expect my colouring to be perfect, it's not it was quick, but it will serve to show that you don't need fabulous colouring skills to make great cards, you can colour some things up simply and very quickly and still be pleased with your end result.

So...enough yap, I have 2 cards to share with you today, I made them very similar, using the same basic layout and elements and just changed up which snowman stamp I used and the accent colour and sentiment, but the rest is more or less the same making the 2nd one even faster to make. 


You  could make a whole batch of these with different accent colours and sentiments etc and they would all still be individual.


I used Wink of Stella on both the snow bank and the snowmen and pole, which gives them a lovely frosty sparkle, but sadly as usual I could not seem to pick it up on camera, but it does look so lovely in the flesh.

Items used

Plain White Cardstock
Distress Ink Markers
Memento Inks
Wink of Stella Clear Pen

With a little extra work these would also make great shaker cards.

That's all from me today but I'll be back tomorrow with my card for The Ribbon Girls final challenge for 2016 (and no it's not CAS!)

Have a great Saturday!

Sunday, 30 October 2016

Christmas Spaniels - Take 2


Hello!

Today I have a card made with the 2nd of the 3 stamps in the Christmas Spaniels set by Crissy Armstrong.

This little cutie is sporting a pretty bow and a pair of antlers, sooooo adorable.


I coloured this one up with golden red fur, with my distress ink markers, and also used one of the small sentiments in the Joyous Holiday clear stamp set
plus a chipboard word from Make it Crafty. I inked the lower portion in red ink and the top I embossed with white embossing powder.

The papers are  from Whimsy Stamps and the die I used is from MFT.

I added a couple of Snowflakes cut with the Layered Snowflake die set and I used the same white embossing powder on those too to give them a glossy finish. I finished up with a few glittery red enamel dots from my stash.

That's all from me today, happy crafting!


Sunday, 18 September 2016

Elisabeth Bell - Apple Nellie


Morning all! It's time for another 'Anything Goes with an Image' challenge at The Ribbon Girl and for my project today I'm using another of Whimsy Stamp's new September release. I love this release soooo much there are so many wonderful goodies to play with.

This one is called Apple Nellie and I coloured her in distress inks. I've linked all my Ribbon Girl goodies for you below.

Distress Ink colours used:

Hickory Smoke, Worn Lipstick, Vintage Photo, Antique Linen, Mowed Lawn, Candied Apple, Brushed Corfuroy (I think, these are from memory and my best guesswork because I forgot to write them down doh!)


I used the following products from The Ribbon Girl:

Cheesecloth, Posie Dark Pink Seam Binding, Charlotte Elizabeth Vintage Style White Lace, Pale Pink 20 mm Open Roses, Sweetheart Blossom White, Rose Leaf, 5 mm Pearls Ivory Self Adhesive

There will be 3 winners and we'll share your projects on the blog when we announce the winners:

First prize:  £10 voucher for LOTV
Second prize:  £10 voucher for The Ribbon Girl
Third prize:  from Marianne Designs

This challenge will run until Saturday October 1st, you need to leave a link to your project using the Inlinkz button at the end of this post and please play fair - this is a fun challenge, no cheating by linking an older project as it's not fair to everyone else. All the prizes are for the named winner only and can't be swapped, exchanged or donated.

For those of you that haven't yet entered, I'm giving away some lovely candy on my blog. You have until 4th October to enter and can find the post here.

That's all from me today, but I'll see you again soon.

Friday, 16 September 2016

Wee Stamps - Mistletoe Fairy


Well it's the final day of the Whimsy Stamps September release, I hope you've been enjoying seeing them. I love this new release so much though that you'll be seeing lots more of it from me throughout this month.

Anyway, today my card is using one of the new Wee Stamps Collection, she is called Mistletoe Fairy.

Now I could have coloured her up in more traditional mistletoe cololurs, and I probably will do that later, but I really wanted to see her as a little winter fairy. I also decided to do a spot of monochrome colouring with a pop of colour that I'm fond of, but this time to change things up a bit I went with sepia tones rather than greyscale.


I used some lovely pages from the new Winter Wishes pad, and a couple of the glittery enamel dots to match which are gorgeous!

I also used the new Snowflakes Dies.

I love the way she turned out. I was going to add flowers to this card, but I thought the new snowflakes looked so nice that it didn't really need it.


I used my distress ink markers to colour her in and just used 2 pens, Frayed Burlap and Broken China.


The cheesecloth and seam binding are from The Ribbon Girl.

That's all from me for today, but I'll see you soon. Don't forget that there's still time to sign up for my stamp and die giveaway here 

Have fun!

Thursday, 15 September 2016

Lee Holland - Christmas Penguin

Hello!! It's almost the end of my working week and I'm very much looking forward to the weekend as it's been mega busy, lots of deadlines to meet and trouble to shoot. Luckily for me this card was made way in advance as it was designed for a Whimsy Stamps feature in a magazine.

The stamp, called Christmas Penguin, is designed by Lee Holland, who does just the most adorable animal drawings, and is part of our new September release.  It's another CAS card, I know, I know, I had to have a long sit down to recover from all the lack of flowers and bows and stuff recently lol.


It's coloured in distress ink markers and I used minimal colours here, you could even use the monochrome with a colour pop technique here, it would work very well.

Colours used were Hickory Smoke, Brushed Corduroy, and Broken China.

I cut him out with a postage stamp die and popped him up on a little foam tape. I didn't ink any edges this time as I wanted to keep it very clean and fresh looking.

The sentiment is from an older Whismy set called Simple Holidays which is sadly now out of stock.

For interest I just added some tiny snowflake dies, topped with a few small gems coloured with Copics to match, some Glamour Dust for sparkle and I layered some Grosgrain and sparkle Sugar Dot ribbon. The ribbons and the lovely papers from the Snow Queen pad are all from The Ribbon Girl.

I hope you like it, I'll be back tomorrow with more from the new release and this one isn't CAS! 

Tuesday, 6 September 2016

Crissy Armstong - Moose Friends

Hello lovely crafters! I can't believe it's been a week since I've posted something, but between hurting my back and my Dad going into hospital, not to mention preparing my lesson material for the Whimsy Craft retreat ....which is only 3 short weeks away......eeeeek!!, I just don't seem to have gotten around to blogging and the week has just slipped away.

But anyhooo, on with the sharing and this time I've gone all CAS. This is not my usual style as you know, but I do love it when you want to send a quick card in the post and it really does seem to suit some images more.

This stamp, Moose Friends by Crissy Armstrong, appealed to me as soon as I saw it, it's just so fun and heart warming. I love the punny sentiments that come with it too and just had to use one of them on my card.


I coloured them up with my distress ink markers:
Vintage Photo, Antique Linen, Peeled Paint, Shabby Shutters, Fired Brick, Festive Berries, Worn Lipstick, Pumice Stone,
 to match these lovely papers. You're getting a bit of a sneak peek of these as they are being released next week! I cut out a little frame using a small rectangle die

I thought this would be perfect for sending to a couple for Christmas, but you could also send it to a loved one depending on which sentiment you use.

That's it from me today, have fun!


Sunday, 24 July 2016

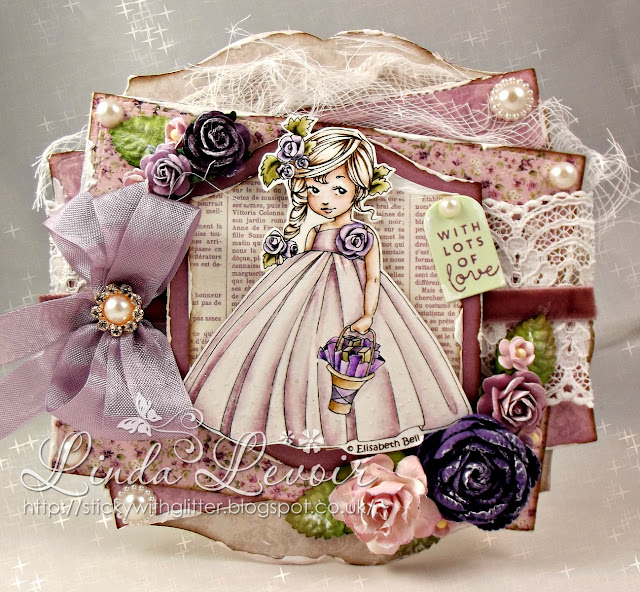
Whimsy - Elisabeth Bell - Birthday Belle


Hello everyone!

Quick post from me, originally I was going to post this in the week, but as we (Whimsy Stamps) are having a weekend event over at Passionate Paper Creations, I've  bumped this post up a little early to join in.

This is Birthday Belle, drawn by Elisabeth Bell. One of the new July rubber releases from Whimsy Stamps, isn't she adorable?
I went super soft and pretty with this one with a side order of shabby chic.


Coloured in my distress ink markers as usual, I was planning on having a play with my pencils this weekend, but I cannot for the life of me find where I put my sharpener, so that will have to wait till I can get to the shops to buy a new one, unless it shows up in the meantime lol.


Anyway, colours used were: Vintage Photo, Antique Linen, Frayed Burlap, Milled Lavender, Wilted Violet, Dusty Concord, Shabby Shutters, Forest Moss and Pumice Stone, to match some pretty Pion Papers from the Scent of Lavender collection.

I cut the main shape with a Go Create die and the layers were cut with the Whimsy Stamps Hand Stitched Nested Rectangles die, the largest size in the set. The frame is cut with an MFT die, I can't remember the name of this one.

I inked my edges with Walnut Stain Distress Ink and then followed up with plenty of gesso.  I disn't distress my edges, but I did soften them with some cheesecloth.

A little tag and sentiment from Mama Elephant and some embellishments from The Ribbon Girl to finish and she was done.

I hope you  like, if you're on Facebook, do join in with our fun and games over at Passionate Paper Creations and in our own Whimsy Stamps Group.

From The Ribbon Girl

all other embellishments are from my stash.

If you are in the UK you can get all the stamps and dies (apart from the Go Kreate one) from 

That's all from me today, I'll be back in the week to share more.

Have fun!