My Lovely Followers

Showing posts with label Dies to Die For. Show all posts

Wednesday, 26 April 2017

Friend you're the best

Hello!

I had a play with my MFT Blueprints 15 today to create a layered card with vellum.

I love adding vellum to my layers as it stops the card from looking too 'heavy', even with a few layers.

I white embossed a piece of 5.5 by 4.25 inch watercolour cardstock using the Wavy Colouring Book background stamp and then did some ink blending with my Distress Inks, I've listed colours and products at the end of my post.

Once dry I cut into the piece with the larger angled die from the set, giving me 2 pieces. I then cut a piece of heavyweight vellum with the largest die and layered that between my 2 inked pieces, covering the hole left in the base.

I added a die cut strip of cherry lustre cardstock to the side, white embossed a sentiment on a scrap of the vellum and cut that with the sentiment strip die.

I cut out my word once in cherry cardstock and several times in white and layered them together with adhesive and then lined the letters up above my sentiment strip.

Finally I finished with a few sequins.


Items used
Cold Pressed Watercolour Paper
Distress Inks - Antique Linen, Tattered Rose, Victorian Velvet, Aged Mahogany
Vellum
Smooth White Cardstock
White Detail Embossing Powder
Cherry Lustre Cardstock

Wednesday, 15 February 2017

Happy Birthday to You

Hello!

I had a little bit of a shopping spree at Simon Says Stamp recently, (well it was my birthday recently), I've never bought from there before and I normally wouldn't pay the shipping from the States, but they had a few exclusive things that I really wanted, some of which I've been looking at for a while now, so I made one big order.

Part of my order was this background stamp,  (you will have seen another SSS background stamp on my card from yesterday), clear stamp set and matching die. I've listed the products at the end of my post along with a couple of MFT and Memory Box dies I used if you want to take a peek.


So how did I make the card?

Well first of all I used the background stamp with some Versamark Ink on some watercolour paper and then used some white embossing powder and heated that till shiny. Then I did some emboss resist, blending some distress inks over with my blending tool. I used a combination of Blueprint Sketch, Cracked Pistachio and Twisted Citron. Once I was happy with my blend I wiped the whole thing over with a piece of kitchen towel to clean up my white embossing and make it nice and bright.
I sprinkled a few water droplets onto my finished panel, waiting a few moments before blotting and lifting some of the colour. Then I took some Lindy's Stamp Gang spray in a metallic green and just flicked a few drops from the end of the nozzle tube and left it to dry.

I then cut a piece of silver miri card a quarter inch smaller then my card base and cut out the centre with a postage stamp die. I used the same die to cut my stamped and blended paper and then inset that into the miri card gluing the whole thing to my card base.

With the centre of the miri card that wasn't used I cut out my word, cutting another 3 from plain white cardstock and gluing them all together with the silver on top to make a nice dimensional word.

I then cut my banner from a piece of plain white cardstock and stamped and embossed my sentiment embossed with versamark and some silver embossing powder.
I cut a 3 and a 0 in some light green cardstock that complemented my blending and glued that in the bottom right corner. Then I positioned my word and banner on my card, when I was happy with the placement I adhered them in place and added a few sequins.

I like the way this turned out, and although it looks fairly simple, it felt really creative to make.

Items Used

SSS You Matter Background Stamp
SSS You Matter Clear Stamp Set
SSS You word die
MFT Stitched Sentiment Strips
MFT Postage Stamp Stax
Memory Box Classic Numbers

I'm entering the Simon Says Stamp Monday Challenge - Use Your Favourite Tool (die cutting machine)

Thanks for dropping by!


Saturday, 17 December 2016

Mama Elephant - Polar Pals


Hello!

I've been super busy at work recently, but I've still managed to get some Christmas crafting done in my down time.....quite a lot of cards actually. How you ask? Well I bought a Mama Elephant Polar Pals Stamp Set and matching dies, and proceeded to see how many different CAS cards I could knock out with them. I surprised even myself.

Now these are all super quickly made cards, no do not expect my colouring to be perfect, it's not it was quick, but it will serve to show that you don't need fabulous colouring skills to make great cards, you can colour some things up simply and very quickly and still be pleased with your end result.

So...enough yap, I have 2 cards to share with you today, I made them very similar, using the same basic layout and elements and just changed up which snowman stamp I used and the accent colour and sentiment, but the rest is more or less the same making the 2nd one even faster to make. 


You  could make a whole batch of these with different accent colours and sentiments etc and they would all still be individual.


I used Wink of Stella on both the snow bank and the snowmen and pole, which gives them a lovely frosty sparkle, but sadly as usual I could not seem to pick it up on camera, but it does look so lovely in the flesh.

Items used

Plain White Cardstock
Distress Ink Markers
Memento Inks
Wink of Stella Clear Pen

With a little extra work these would also make great shaker cards.

That's all from me today but I'll be back tomorrow with my card for The Ribbon Girls final challenge for 2016 (and no it's not CAS!)

Have a great Saturday!

Friday, 23 October 2015

Saturated Canary - Butterfly Baby @ Dies to Die for

Happy Friday! My goodness I'm glad that this week is coming to an end, it's been sooooo busy, I've been surviving on around 4 - 5 hours sleep a night, not good when you have work the next day lol!  I have a busy weekend too, but at least I have a couple of days off work to look forward to.

Time has been catching up with me a lot lately, I've been very busy at work and there have been all sorts of other pressures on my time outside work that I won't bore you with here, but some days it's been very hard to find the time or even the inclination to craft. With Christmas fast approaching too I've had to sit down and take a serious look at my time management. As there are not enough hours in my day and as I have to work to keep a roof over my head, I've made the painful decision that it's time to cut back on some design team work for now.  I would still like to craft, but crafting is a hobby I turn to to chill me out when things are stressful, not to add to my stress with manically trying to get things made for deadline, or making projects with images that are not what I would choose to if I had to buy them. So it's with a sad heart that I'm dropping 2 - 3 of my design teams. I'll make an announcement on my last day of posting for them, but although it was a very difficult decision to make and took hours of thinking and discussing and working out time commitments, I must say that once I'd made the decision I felt a whole deal less stressed.

Now that doesn't mean that you won't see posts from me, just that I will have the time to work on things over a longer period of time and do what I feel like, whether that's a card, a mini album, or finally getting around to filming the tutorials for you that I've kept wanting to do. Also I'll be sharing some Candy with you soon as I'm having a big sort out of my crafting corner before Christmas. Once I've organised my life a bit more and caught up on my sleep etc, I'll reassess....after Christmas, to see if I have the balance right and go from there. I think guest spots may be the way to go, they last between 1 post and 3 months, so you always know you can take a break 'soon'.

Anyhooo, enough of this waffle and on to my card for today. This card uses one of my favourite stamps for baby cards 'Butterfly Baby' and was made as a special order for a friend of my daughters.
As usual links are at the end of my post.


I was asked for 'neutral' colours - mint or yellow, as they don't know the sex of the baby yet. This papers are just lovely for it, and on sale too...bargain!!


A view from the side so that you can see the dimension. The moon die is from La-La Land Crafts, it was part of a club kit set, but should be released soon and I'm sure Tracy will stock it.

Butterfly Baby
Bildmalarna Box Offer
Die-namics Pierced Star STAX
Taylored Expressions Sequins - Wedding
Stork Charm
Baby Pacifier Charm
Walnut Stain Distress Ink

Aqua Ruffle Edge Sheer Ribbon
38 mm Sheer White Silver Glitter Organza Ribbon
Ivory Button Twine
3-6 mm Ivory Self Adhesive Pearls
Aqua Rolled Roses
30 mm Ivory Wild Rose

The wonderful butterfly is from my talented friend Kay Fatula, you can find her shop here, her butterflies are amazing!

Well that's all from me, but I'll have another post for you later today. Have fun! :) xx

Friday, 16 October 2015

Wee Stamps - Snowflake Dancer

Ok so.....make sure you're sitting down....I made another Clean & Simple card. I know right?!
Those of you who have been followers of mine for some time now will know how difficult I find these. This one was no exception, once I had the image coloured up and cut out I really struggled with it. I knew I wanted to keep it clean to showcase the beautiful drawing by Sylvia Zet but I kept feeling that I should add more. Luckily I resisted, because now it's finished I really love it.


I coloured her with my distress ink markers, this beautiful blue is one of the newer colours Blueprint Sketch and comes out quite Violet toned when diluted.


I outlined all the clothing hair and snowflakes with my Sakura Gelly Roll pen - Clear Star. This adds a wonderful soft metallic sparkle and I wish the camera would pick it up properly, because it looks so pretty in real life,


I had this sentiment stamp laying around in my drawer and it was the perfect size (and sentiment) for this card and just filled in a little bit of that white space without looking too fussy. The silver ink complemented the style of the painting perfectly I thought. 

Adhesive Gems - Seaside

That's all from me today but I'll be back to share more inspiration next week.
Have a lovely weekend! :) xx

Friday, 9 October 2015

Saturated Canary - Amber in the Arbour

Hello everyone!
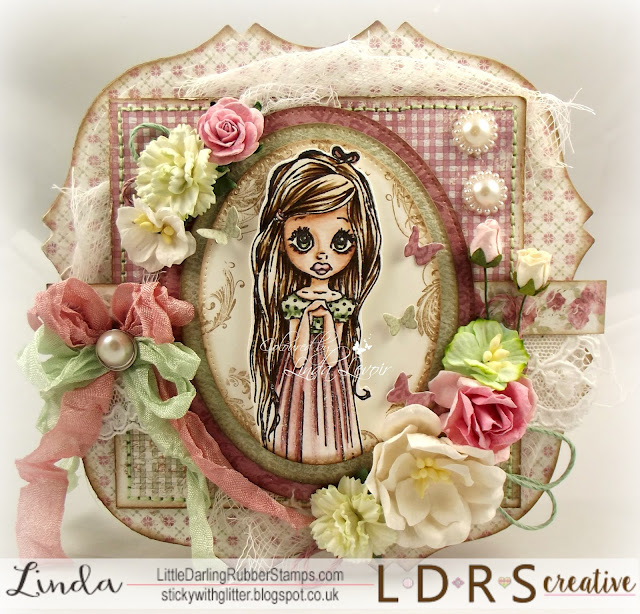
Today I'm using one of my favourite Saturated Canary Stamps from  LDRS Creative.
This beautiful girl is Amber, from the Sweet N Sassy range. Doesn't she just have the sweetest expression?


I coloured her with my distress ink markers to match these pretty Maja Design papers from the Coffee in the Arbor collection, and gave her light golden brown hair.


I fussy cut the image and added back some of the butterflies I lost with this memory box die.


Love how this seam binding matches my papers.


and just to prove that even us DT girls aint perfect, I've just noticed that one of the large pearl embellishments I used had slipped while drying and is now wonky! Ooops. Oh well, we'll say it adds to the charm and leave it at that ;) 
That's all from me today, have a wonderful weekend and I'll see you here again on Sunday :) xx

Tuesday, 22 September 2015

Elisabeth Bell - September Rose

Happy Tuesday everyone, I hope your week got off to a good start!

We have a new challenge over at Deep Ocean Challenge and this time it's Autumn.

We'd love to see you join in with our challenge and as always we have a lovely prize to be won as well as a badge for your blog.

I chose this beautiful Whimsy stamp from Elisabeth Bell called September Rose, isn't she beautiful? I thought she was perfect for a beginning of autumn card and I chose these pretty Glitz papers in browns and deep rose and coloured her with my distress ink markers to match.


I'm currently putting together a series of tutorials on how I colour with my distress ink markers, as I've been asked to do one quite often, I hope to have them ready in a couple of weeks, so do keep an eye out for that if you're interested.

The leaf and fence dies are from La-La Land and will be available in the shop soon.

(which I have managed to almost completely hide with my die cuts sigh)

The beautiful butterfly is from Karla's Kreative Korner

Before I go I just have to mention that the Ribbon Girls are looking for a guest DT for their October card challenge, so if you fancy trying out, you can find the details here.

Enjoy the rest of your day! :) xx

Friday, 18 September 2015

Elisabeth Bell - Strawberry Dreamer

Happy Friday everyone! I'm back with another Elisabeth Bell stamp today. This is one of her older images from the Cottage Cuties collection.

This is called Strawberry Dreamer, isn't she lovely?
I didn't have any paper with strawberries on, so I pulled this Maja Design paper out of my stash that had raspberries on, close enough right? :P


Anyway, I love the way this turned out and hope you will too.
Products are linked at the end of my post.


Love that strawberry charm, just perfect for this image.


I liked the contrast of the deep reds with paler creams and greens.


A little view of the inside.

From Dies to Die for

From the Ribbon Girl
Cheesecloth
Ivory White Magnolia Flower
Burgandy 20mm Open Roses
White/Purple Pink 2 Tone 30 mm Wild Roses
Cream 20 mm Open Roses
Berries Red Beaded
15 mm Andrea Ivory Fine Cluny Lace
38 mm Vintage Plum Fluted Edge Sheer Ribbon

That's all for now, but don't wander too far because I will be back with a super exciting Blog Hop later today! :) xx

Friday, 11 September 2015

Tiny Townies - Blossom Loves Balloons

Happy Friday everyone. I'm always pleased when Friday rolls around, because apart from the fact that it's the end of my working week and I can look forward to some weekend crafting time, I get to share my D2D4 DT make with you.

This time I used one of the new super cute Tiny Townies from Stamping Bella.
I love these!
This is Blossom Loves Balloons and I paired her with the new delicious Summer Crush collection from Maja Design, they are just yummy.

Here's what I made


Walnut Stain Distress Ink

Pale Pink Pure Silk Ribbon
Clementine Ivory Lace
20 mm Dusky Blue Open Rose
Apple Blossom Mixed Pastels
Pretty Blossom Pink
Beaded Stamen Blue/White

Well that's all from me today, but I'll be back on Sunday with some more cuteness to share with you. Yup, despite having an awful head cold, I've been a very busy girl this week lol!
See you soon! :) xx

Thursday, 27 August 2015

Homespun Mini Album

*Warning, photo heavy post*
Happy Friday all! Welcome to my newest followers and a big heartfelt thank you to the rest of my followers who continue to stick with me through all my ramblings, I would not be here if it weren't for you :)

As it's Friday it must be time for another DT make for Dies to Die for. This week I have another mini album to share with you, I really love making these, though they can be a bit time consuming sometimes.

This one actually went together pretty quick, the page design is a simplified version of the pages  in my Say Cheese album, because I only had 1 6 x 6 paper pad to play with. I think it came out great!

This paper pad has a lot of 'homemade' elements to it and I picked up on that theme for my album and highlighted it with my choice of charms, also choosing some rustic ribbon and button twine to fit in with the whole feel of the album.

I've linked the products used at the end of my post.


I have a quick video of this project.


Items used

15 mm Red/Cream Rustic Gingham Ribbon
28 mm Gloria Ivory Fine Cotton Lace
Ivory Button Twine

I hope you like my make for today, I'll be back at the weekend with more to share, until then, happy crafting! :) xx

Friday, 21 August 2015

Brittany the Birthday Girl

Hello everyone! Friday has rolled around so quickly and I'm here to share a little Uptown Girl goodness today.

Recently my sister got in touch to ask me to make a card for her partner's mother who is turning 80. Now I know you are looking at this card and probably thinking....blimey, that's a bit bright for an 80 year old lady, but I think you can enjoy things a little 'out there' whatever your age, and my sister thinks she will love it.

To be honest the whole thing just screamed bright colours at me as soon as I saw the stamp, so I just had to go with it!

So this is Brittany the Birthday Girl and I coloured her with a mix of Distress Ink and Spectrum Aquatint Markers, the new(ish) Twisted Citron was perfect for the paper I chose. I've popped a list of items used with links for you at the end of my post.


Dies to Die for

Ribbon Girl


Friday, 31 July 2015

Ruby Wedding Vintage Style

Hello and happy Friday! It's the end of another working week and I'm hoping for a bit of a relaxing weekend to unwind and recharge.  Recently I was asked by a friend of a friend if I would make a card for a Ruby Wedding anniversary.

The brief I received was 'accents of ruby' (standard) and 'something simple'.....umm.....simple? I asked my friend if this person was familiar with my work and was told yes.....well that left me scratching my head a bit I can tell you lol!

Simple my work is not, so I must admit that for  a long while Mr Mojo went on an extended vacation whenever I thought about working on this card.  In the end my  card is not really 'simple' but I guess for me it has an air of simplicity about it.


I used the following products on my card