My Lovely Followers

Showing posts with label LLC. Show all posts

Friday, 11 October 2013

DT Crafty Catz - Halloween


Good morning folks, hoping this Friday finds you all well and looking forward to the soon to arrive weekend (I know I am!).

First I need to say a big hello and welcome to my newest followers and also give a big hug to my existing followers and a thank you for putting up with all my ramblings lol.

This is a scheduled post and I'm actually typing this out Thursday evening after a VERY long and busy day at work, so it will be lots of pics and very little blather from me for a change.

Our challenge at Crafty Catz this week, chosen by the fabulous Sue (known to all as Aunty Sue), who is such a helpful member of our DT and who keeps us all laughing, is Halloween.

Those of you who saw my post yesterday will know I have recently created something spooky, so I decided to go for a cute Halloween rather than a scary one.  This is what I made.


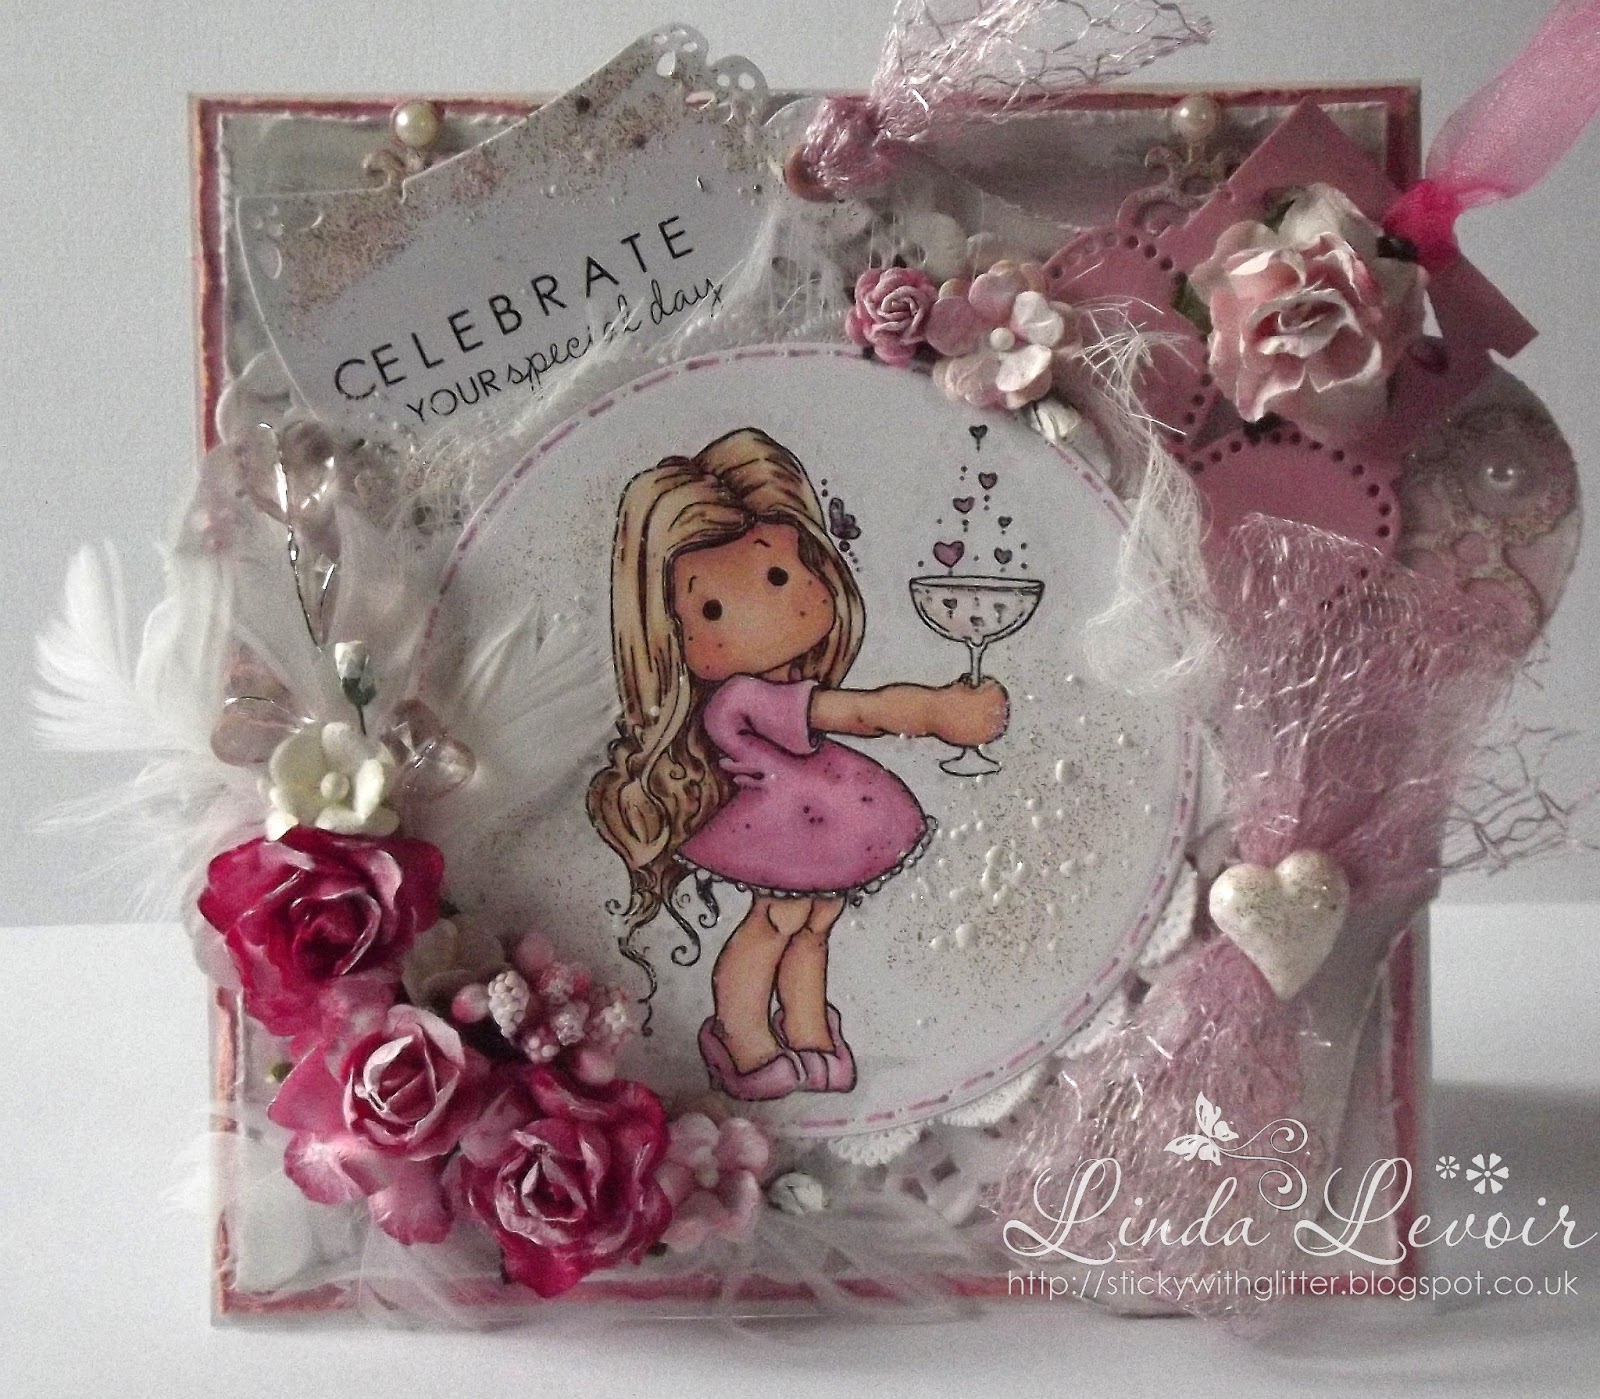
The image is a Wee Stamps one from the very talented illustrator Sylvia Zet, she draws super cute images, love this little witch and just look at that adorable bat on her broomstick, if bats were actually as cute as that I would so want one as a pet lol and if you go check the challenge blog you'll see a card by my team mate Naomi with another of Sylvia's stamps that has 2 of those cute bats....adorable overload! LOL


She's coloured in copics as usual for me, for once I'm not putting the colours as I'm so tired and just blogging super fast.


I used some autumnal looking fruits and flowers and the ticket sentiments are made with a Whimsy die and stamp set.


I gave the inside a bit of a Halloween feel too.

I haven't listed out all my mats and equipment today to save time, but if anyone would like more details about anything just post your question in a comment and I'll reply with an answer.

Thank you so much for dropping by and don't forget to drop by the challenge blog, the girls have made some gorgeous creations and we have 2 prizes this week from BunnyZoe Crafts and Marianne Designs.

That's it from me today, I hope you enjoyed my share and that it's inspired you to join in with our Halloween challenge.

I'm entering this card in the following challenges:

Papertake Weekly - Two by Two (Two Tickets)
Crafty Sentiments - Anything Goes
Divas by Design - 3 or more layers
7 Kids - Anything Goes
Hanna and Friends - Halloween
Stampin' for the Weekend - Anything Goes
Whimsy Stamps - Shabby/Vintage
Magnolia-licious Shaped Cards


Enjoy your day and happy crafting! :) xx


Thursday, 10 October 2013

GDT Country View Crafts - Something Spooky


Good morning crafters (and non crafting readers, all are welcome here).  Today I'm here with a piece I made for Country View Crafts.


When Chris from Country View Challenges emailed me to tell me that I was one of their top 3 for August it was a very happy surprise, so imagine how super excited I was when she told me that they'd like me to create a GDT piece for their October challenge!  Of course I said yes!  The theme given to me (which I had to keep all these weeks as a secret....no pressure lol) was to create 'Something Spooky'


I knew right away which image I wanted to use. It's called Withering Fairy, one of the Saturated Canaray digis.  I'd seen it when Krista Smith (the artist) first released it and right away it made me think of Gothic Romantic images....think Miss Haversham in Great Expectations, sitting in her wedding dress while the wedding breakfast rotted and dissolved around her, or Catherine from Wuthering Heights coming back to haunt her true love Heathcliff....or again Giselle, dying from unrequited love and coming back as a vengeful spirit.


So that was the kind of feel I wanted for my project.  I coloured her up in teal and purple and warm greys which I thought worked well for both the image and the feel of the project.  I used a little Frantage in Aged Wine around the image too, which helps give it that old and decaying look. I just added very minimal Glamour Dust to her wings as I wanted her to look kind of like the magic was fading away.


I found some old scraps of design papers with a mottled and aged look to them, I don't have a clue what they were I'm afraid and I've all but covered them in my project anyway, so I guess that's not important lol.

They've been distressed, inked with Black Soot distress ink and stitched with black top stitch thread.


Then I started layering my elements.  I started with Rickety House from Tom Holtz, which I  cut in both grey and white card stock,  I inked the edges of both with some Black Soot DI, and then added some Crackle Paint in rock candy, and then rubbed over a little more Black Soot.  I layered the white on top of the grey to give it some depth and stuck it to my background.


Next I cut a Cheery Lyn Clock die from a scrap of Maja paper, from the Shall We Have Coffee, collection and cut it again in grey card stock which I stuck behind it to give it a little more stability and also cut the hands in the grey and brushed them with a little black Stickles. I set them at just past Midnight...of course!  Then I cut 2 Tom Holtz trees, in Grey and White again and they got the same treatment I'd given to the house.  Again I layered the white on the grey, off set slightly to create the effect of a shadow.  I added a little Stickles in Crystal to the white tree for effect.   


I cut some white card with Graveyard Landscape by Memory Box and cut and stuck the grave stones all around the upper part of the image after sponging with a little Black Soot. Then behind that I used some pleated black tulle and finally some cheese cloth. I used some foam pads to give it some height and slipped a black doily, rubbed with a little white acrylic behind the very top.


I cut several pieces of card with the Heart Doily Border from La La Land Crafts and distressed and inked them to age them and then edged the whole project.  I finished up with a memory box spider, a little ghost die cut I had in my box of bits, some shabby seam binding, some bead string and gems and some WOC flowers which I inked in Black Soot along with a couple of glass blackberries.

Although I started with a card in mind I decided to make it into a wall hanging as I thought it was more suited to that, besides we don't really give out Halloween cards in the UK, so I thought it would see more use as a decoration.

Well that's all from me, hopefully Mr Blogger has played nice as this post is scheduled to go live while I'm heading for work.  Have a great day and don't forget to check out my Candy before you leave. :) xx


Monday, 7 October 2013

Tiddly Inks Tanker Fairy Flies


If you're looking for my candy it's here.
I got a chance to play and just create something for the fun of it yesterday, which was nice as I have quite a few projects on the burner that need to get finished this week or by the weekend that it was nice to take a little time out and jut be creative for the sheer joy of it.

Anyhooo....here's what I made (and sorry I didn't post it yesterday, I was really busy and then I got so carried away creating I didn't get time to take pics and post).


The papers are the new Autumn Basics by Maja Design, aren't they yummy? These are the 12 x 12 versions.  I thought the hot air ballons and the clocks had a real steam punk feel to then as well as vintage, so I decided to go with the flow.  The clock  and gears dies are from Cheery Lyn and I used a  Go Kreate die to create the card shape. I stitched all the papers with top stitch thread in Nutmeg and inked the edges with Vintage Photo distress ink.


The image is Tanker Fairy Flies, a Tiddly Inks digi by Christy Croll, I really love the Tiddly Inks stamps, they're so much fun and a joy to colour. She's coloured in Copics as per usual for me and I've just noticed (how embarassing) that I missed  a small lock of her hair, so I shall need to go and touch that in lol.


The flowers are from Wild Orchid Crafts, the velvet ribbon (love it) and the seam binding are from The Ribbon Girl, the lace and pine cones (I think they look great here and they're sooo cute) are from Live & Love Crafts as are the Screw style Brads. I can't remember where I got the little clock charm but I think several of the shops sell them.


I cut the cogs in blue corrugated card, toned down the brightness a bit with some white acrylic paint and them added some frantage in shabby white.  I think they look pretty cool attached with the screw brads.


The inside is decorated to complement and coordinate with the front. More of that yummy Maja paper.


To finish I just added some pearls and a couple of flourishes.  You can see the tag pulled out here, this is cut from one of the 12 x 12 sheets which is full of tags, elements and vintage photos, great additions to your cards.
To make the seam binding look shabby I just screw it up into a small ball and then roll it between my hands in little circles so that it creases and textures.

Well that's it from me, don't forget to check out my blog candy here  before you leave.
Have a great evening :) xx

I'm entering my card into the following challenges:


Sunday, 21 July 2013

Pretty in Pink


Good afternoon, we've certainly had a change in the weather here in Leeds, it's cool and overcast today and I must say that much as I like the sun, this is much nicer weather for crafting.


Apologies for not posting again yesterday as promised, I didn't actually realise what the time was at the time of posting and the day simply ran away with me.


Anyhooo..on to the card.....

I bought this stamp simply because it was so pretty I thought I'd probably end up using it a lot.  So wanting to use her and not having an actual card in mind to make at the time I turned to some current and new challenges and designed a card with those in mind and ended up finding 6 that inspired me that I could use together on one card!

This is the card I ended up making.  Doesn't she look sweet?


This was my first proper go at using Frantage and honestly I can see why people use it lots, it's very addictive, I had to control myself, it's so much fun, but very frustrating when it blows away lol.

I have to give a big thanks to Tracy Payne for her excellent tutorial on how to use this stuff, it gave me the courage to give it a try, thanks so much for sharing that Tracy. 


I coloured Tilda with copics: Skin E00, 21, 13 and R20 for the cheeks.  Dress and shoes R81 & 83 and RV10. Hair E50, 51, 53 and 57


I cut the image out with a Spellbinders nestie circle and backed her with a small paper doily. I used some small white feathers behind the flowers.  DP used was Magnolia which I distressed with a Tim Holtz tool and gave an edging of white acrylic paint.  I used a large white doily and cut another layer of paper with a Spellbinders labels 1 die.


Flowers used are mostly from WOC as is the crystal stem.  The label here is a DooHicky one and the sentiment is from Pink Petticoat this one is useful as I didn't make the card with an event in mind as it can cover various different occasions.


 The Pink heart tag is cut with another Doo Hicky die, love these,  the little clay heart is from LLC and I've frantaged it with Shabby Pink as before.

Ribbon is all from stash.

I hope you enjoyed my first real venture in frantage and shabby chic, the challenges I made this card for are as follows:


That's all from me for now, enjoy the rest of your weekend, and if you've made it to the end her, do please leave me a comment, I do read and cherish every single one xx